
The recovery position is one of the most important techniques taught in any first aid course, and knowing exactly when and how to use it can save a casualty’s life. This guide covers key information about the recovery position: What it is, how to open a casualty’s airway correctly, the step-by-step technique, and the critical situations where this skill saves lives.
What is the recovery position?
The recovery position – also called the lateral recovery position – is a stable side-lying position used to protect the airway of a person who is unconscious but breathing normally. It keeps the airway open and allows fluids such as vomit, blood, or saliva to drain from the mouth rather than pooling in the throat or being inhaled into the lungs.
When a person loses consciousness, they also lose the protective reflexes that normally keep their airway clear. The tongue can relax and fall backward, partially or completely blocking the airway. An unconscious person also cannot cough or swallow effectively, meaning any fluid in the mouth poses a serious choking and aspiration risk. The recovery position addresses both of these dangers at once.
When would you place a casualty in the recovery position?
A casualty should be placed in the recovery position when all of the following conditions apply:
- They are unconscious (unresponsive to voice and touch)
- They are breathing normally on their own
- They do not require CPR
- There is no suspected spinal injury, or the risk of airway obstruction outweighs the risk of moving them
The recovery position is commonly indicated in situations such as:
- After a seizure, once the active convulsion has ended
- Drug or alcohol intoxication where the person is unconscious but breathing
- After fainting, if the person remains unresponsive
- Following a near-drowning incident, once breathing has been confirmed
- Any unconscious casualty awaiting emergency medical services, where breathing is normal
The recovery position should not be used when:
- The casualty is not breathing – in this case, begin CPR immediately
- A spinal injury is strongly suspected and moving the casualty could worsen the injury
- The casualty is conscious and able to maintain their own airway
Opening the airway: The head-tilt/chin-lift manoeuvre
Before deciding whether the recovery position is appropriate, the casualty’s airway must first be opened and breathing assessed. The standard technique to open the airway of an unresponsive casualty is the head-tilt/chin-lift manoeuvre.
How to perform the head-tilt/chin-lift manoeuvre:
- Place one hand on the casualty’s forehead.
- Gently tilt the head backward by applying light pressure to the forehead.
- Place two fingers of your other hand under the bony part of the chin.
- Lift the chin upward, bringing the jaw forward, which lifts the tongue away from the back of the throat.
This manoeuvre moves the head from a neutral position into a slightly extended position, opening the airway by lifting the tongue clear of the throat. In adults, the head is tilted further back than in infants and young children, where only a slight tilt – closer to the neutral position – is used, because over-extension can itself obstruct an infant’s airway.
After performing the head tilt-chin lift, the First Aider checks for normal breathing by looking for chest movement, listening for breath sounds, and feeling for air on your cheek for no more than 10 seconds.
- If the casualty is not breathing, immediately call the emergency services and begin CPR.
- If the casualty is breathing normally but is unconscious, put them into the recovery position, call the emergency services, and continue to monitor the casualty’s condition closely.
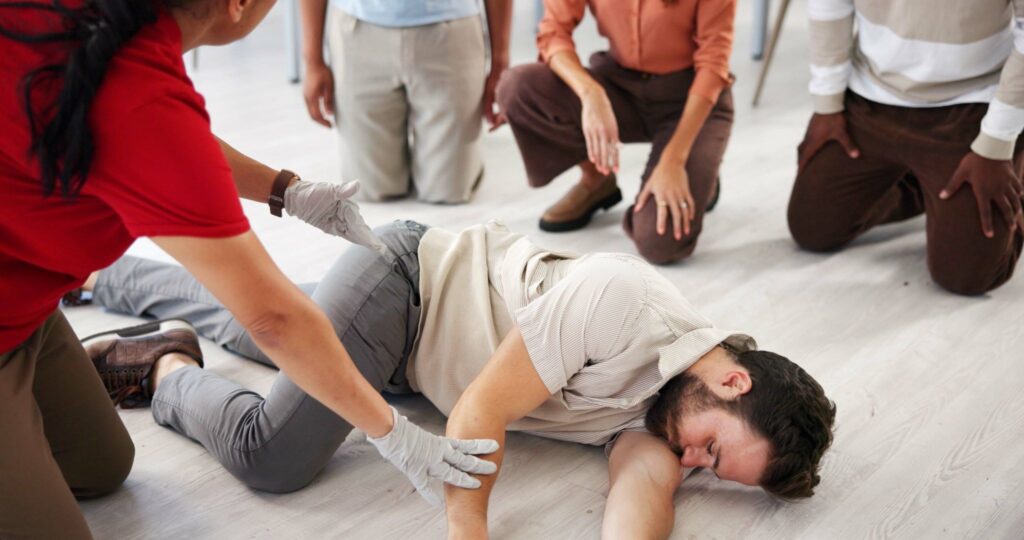
Step-by-step: How to place a casualty in the recovery position
If you have confirmed that the casualty is unconscious and breathing normally, follow these steps:
- Kneel beside the casualty. Make sure they are lying flat on their back.
- Straighten both legs. Position the arm nearest to you at a right angle to their body, elbow bent, with the palm facing upwards.
- Bring the far arm across the chest. Place the back of their far hand against the cheek closest to you, and hold it there.
- Grasp the far leg just above the knee and pull it up, keeping the foot flat on the ground.
- Roll the casualty toward you onto their side by pulling on the bent knee, using it as leverage while keeping their hand pressed against their cheek.
- Adjust the upper leg so that both the hip and knee are bent at right angles, stabilising the body in the side-lying position.
- Tilt the head back gently to keep the airway open, and adjust the hand under the cheek if needed to maintain the head tilt.
- Check breathing continuously while waiting for emergency help to arrive.
CPR or the recovery position?
The recovery position and CPR are two different responses for two very different presentations.
- If a casualty is unconscious and breathing normally → place them in the recovery position
- If a casualty is unconscious and not breathing, or has agonal gasping → begin CPR immediately; do not place them in the recovery position
A First Aider must reassess and monitor breathing continuously while a casualty is in the recovery position. If breathing stops at any point, the casualty must be rolled onto their back immediately and CPR started without delay.
Why the recovery position saves lives
Many people assume that once someone is ‘stable’ and breathing, the danger has passed. In reality, an unconscious person lying on their back remains at serious risk of silent airway obstruction – from their own tongue or fluids like vomit or saliva – often without any obvious warning signs to bystanders.
The recovery position addresses this risk directly and requires no equipment, no specialised tools, and only a few minutes of hands-on training to learn. Being able to put a casualty in the recovery position is one of the most valuable skills taught in any first aid course.
Learn this skill properly in a hands-on, accredited first aid course.
In addition to the recovery position and the head-tilt/chin-lift manoeuvre, essential first aid skills like CPR, AED use, choking treatment, bleeding control, burn treatment, heart attack response, how to recognise and splint fractures, and more, are all covered in detail in First Aid, Fire and Safety Training’s accredited first aid courses. Practical, hands-on training ensures delegates can perform these techniques confidently and correctly under pressure.